Steampunk'd Jacket
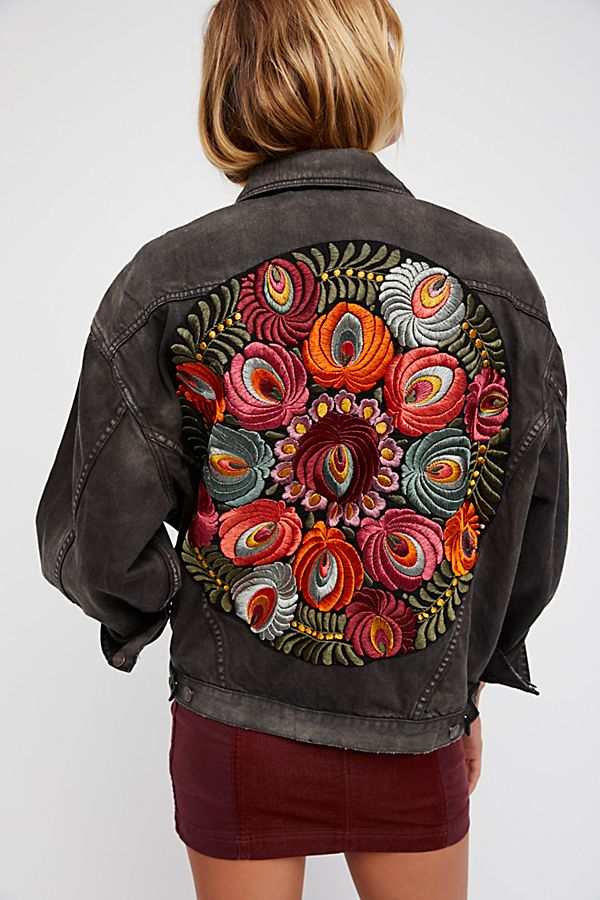
A few months ago my mom made this gorgeous denim jacket (modeled by my beautiful sister) that I wanted to share with you all for this week's blog post. This design is the camera design from Hope Yoder's Steampunk'd Embroidery Collection.
 Embroidered denim jackets are in right now, and this one retails for $120 from Free People! Like whaaaat? That's crazy expensive for something that you could DIY even better! Have you noticed how bad most retail stores are at manufacturing embroidered clothing items? They clearly have no idea what a topper is and why you need one! Which, if you didn't know, you must have a topper to ensure that your stitches will look rich and defined. The topper creates a space in between the material and your stitches so they don't sink into the fabric. You can always tell if a design utilizes topper or not. I love using the Embellish® Rinse-Away Clear Topper because it's so convenient to simply dab at your finished embroidery with a wet cloth or throw it into the wash. Not to mention, it leaves your embroidery looking so much better than an expensive embroidered denim jacket from a store.
Once the paper is applied, hoop your jacket and center the design using your embroidery machine and the crosshairs. Once the design is centered, tape a piece of Embellish® Rinse-Away Clear Topper over the design before you start embroidering. Next, start embroidering your design with Embellish® Special Edition Matte Thread.
*TIPS*
Templates can be used multiple times by placing them back on the waxy side of the release paper. The templates can also make great labels to put inside of children's jackets if they get lost at school.
Once your jacket is finished embroidering, remove the excess stabilizer and topper with your hands. Use the Embellish® Vinyl Weeding Tool to help get into the nooks and crannies to pull out the excess topper or stabilizer. You can also wash the jacket or use a wet cloth to remove the topper.
The design was embroidered on a non-stretch denim jacket using the following supplies:
I want to talk to you about this Encore 15-spool set! This set has some beautiful matte colors like mustard and peach that are not found in the regular Matte Thread line. Get yours today while supplies last while contacting an Embellish® Dealer near you.
Click Here to find your nearest Embellish® Dealer.
 Embroidered denim jackets are in right now, and this one retails for $120 from Free People! Like whaaaat? That's crazy expensive for something that you could DIY even better! Have you noticed how bad most retail stores are at manufacturing embroidered clothing items? They clearly have no idea what a topper is and why you need one! Which, if you didn't know, you must have a topper to ensure that your stitches will look rich and defined. The topper creates a space in between the material and your stitches so they don't sink into the fabric. You can always tell if a design utilizes topper or not. I love using the Embellish® Rinse-Away Clear Topper because it's so convenient to simply dab at your finished embroidery with a wet cloth or throw it into the wash. Not to mention, it leaves your embroidery looking so much better than an expensive embroidered denim jacket from a store.
Now let's see what people have to say about Embellish® Sticky Printable Template :
Review by Tracy W
(posted on 09/28,2019 20:44:14)
This printable paper makes it easy to print your deign, place it on your item to be embroidered, then take it straight to your machine without the design moving. Much easier than using painters tape! You can actually see exactly the design will be ending up!!
Review by Carolina m.
(posted on 09/28,2019 16:15:50)
This is a life saver for placement! And placement is all!!! Love it.
Print your camera design out on this sticky paper, peel the release paper, and align and stick on the back of your jacket with ease. This template will help guide you as you are embroidering out your design. You can use software to put crosshairs on the design that will help you get it perfectly centered.
Once the paper is applied, hoop your jacket and center the design using your embroidery machine and the crosshairs. Once the design is centered, tape a piece of Embellish® Rinse-Away Clear Topper over the design before you start embroidering. Next, start embroidering your design with Embellish® Special Edition Matte Thread.
*TIPS*
Templates can be used multiple times by placing them back on the waxy side of the release paper. The templates can also make great labels to put inside of children's jackets if they get lost at school.
Once your jacket is finished embroidering, remove the excess stabilizer and topper with your hands. Use the Embellish® Vinyl Weeding Tool to help get into the nooks and crannies to pull out the excess topper or stabilizer. You can also wash the jacket or use a wet cloth to remove the topper.


Comments