DIY Polaroid Sign
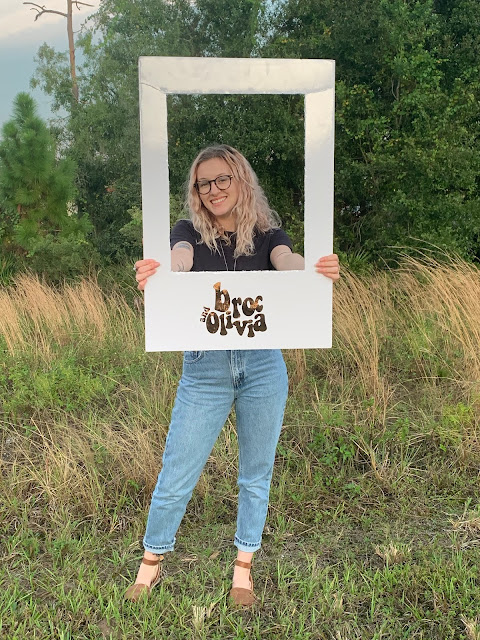
This week I'm bringing you another DIY wedding decor video! I have seen some cute photos on Pinterest of giant Polaroid frames for photo props. It's a unique solution to having a Photo Booth at your wedding. This DIY is super affordable and can be customized to your liking.
I took the logo from our wedding invitations and brought it into CraftNCut. Once my design was in CraftNCut, I used the Save to Cut feature to help me know what settings to use on my ScanNCut. I used Embellish® Heat Transfer Foil in Copper for this frame. I love how easy it is to use this foil! The foil is a one-step process and has the carrier sheet and foil all in the same roll.
You can get really creative with this DIY and make a horizontal Polaroid frame. You could use it for a birthday party, graduation, Halloween part...I love how creative you can get with this DIY. You could also cut out some different shapes like flowers or candles and add them to the frame to jazz it up a little.
I used a box cutter to cut a rectangle out of the center of my foam core board. I measured three inches from the edge and etched a straight line around where I wanted to cut. I went over the rectangle with joy box cutter a few times until I cut it enough to where I could pop out the center.
Once your foil is cut out, you need to weed away the excess so that you have your design left on the clear carrier sheet. I always use the Embellish® Vinyl Weeding Tool when I'm working with foil. Once your design is weeded, place the carrier sheet with the foil on top of the poster board and center it. Iron over the clear carrier sheet and wait for it to cool off before you peel the carrier sheet away. Once the carrier sheet is peeled away, your foil is left on the poster board. You can cut holes in the top and string some twine through and hang this from a tree or a ceiling or simply use it as a photo prop.
I took the logo from our wedding invitations and brought it into CraftNCut. Once my design was in CraftNCut, I used the Save to Cut feature to help me know what settings to use on my ScanNCut. I used Embellish® Heat Transfer Foil in Copper for this frame. I love how easy it is to use this foil! The foil is a one-step process and has the carrier sheet and foil all in the same roll.
I used a box cutter to cut a rectangle out of the center of my foam core board. I measured three inches from the edge and etched a straight line around where I wanted to cut. I went over the rectangle with joy box cutter a few times until I cut it enough to where I could pop out the center.
Once your foil is cut out, you need to weed away the excess so that you have your design left on the clear carrier sheet. I always use the Embellish® Vinyl Weeding Tool when I'm working with foil. Once your design is weeded, place the carrier sheet with the foil on top of the poster board and center it. Iron over the clear carrier sheet and wait for it to cool off before you peel the carrier sheet away. Once the carrier sheet is peeled away, your foil is left on the poster board. You can cut holes in the top and string some twine through and hang this from a tree or a ceiling or simply use it as a photo prop.


Comments