
Chenille
If I'm being quite honest, I've heard the term 'chenille' a million times without knowing what it meant. Shocker, I know - considering I grew up learning how to sew! A few years ago I finally figured out what that arbitrary word meant.
I went to a vintage shop last week with my mom and we stumbled upon this gorgeous vintage chenille robe. My mom was beside herself with excitement - look how pretty this robe is!
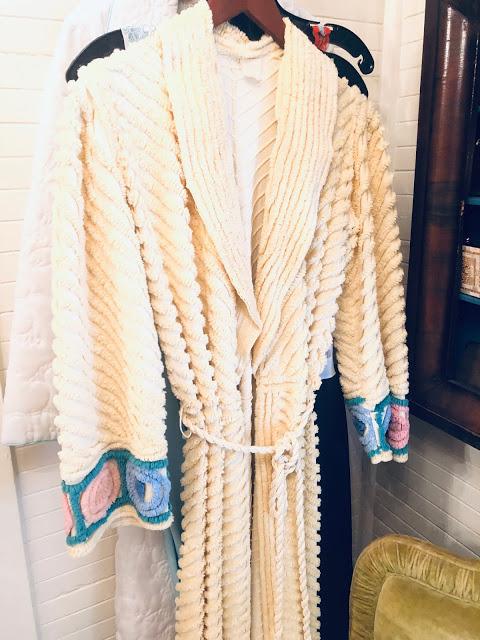

I never thought that Chenille could be so pretty and elegant until the day I saw that robe. Just look at the detailing of the sleeves. Even the robe ties are chenille!
With Embellish® Maker Software, you can turn any design into chenille with a click of the mouse. This feature allows you to take any shape and add the chenille channels instantly! This is such a good hack and a major time saver. This week I'm bringing Chenille back and showing you how we made a cute embroidered fox using theAuto-Chenille tool in Embellish® Maker Software.
Click here to download a free version of Embellish Maker® so you can start making your own chenille projects!
Click here to download a free version of Embellish Maker® so you can start making your own chenille projects!

Once you have stitched out your design with the chenille channels, you will need to slash in between the channels. We used to do this with plain scissors but not anymore! We have this cool tool that was made to fit comfortably in the palms of you hand. Using the Comfort Grip Chenille Cutter is so easy. You just slip the long channel between the three layers of fabric and the foundation fabric and it does all the work for you. It is like a cross between a rotary cutter and a letter opening. After the Chantelle’s are open you will need to fluff the fabric to create the chenille effect. The Comfort Grip Chenille Cutter makes this process so much easier and fun!


Comments