
How to Sew an Easy Pillow
I have a super fun and easy video for you all this week! I love throw pillows as much as the next girl, but dang! They can be super expensive! Ain't nobody got $40 for a semi-cute pillow from Target that is probably going to fall apart by the end of the season.
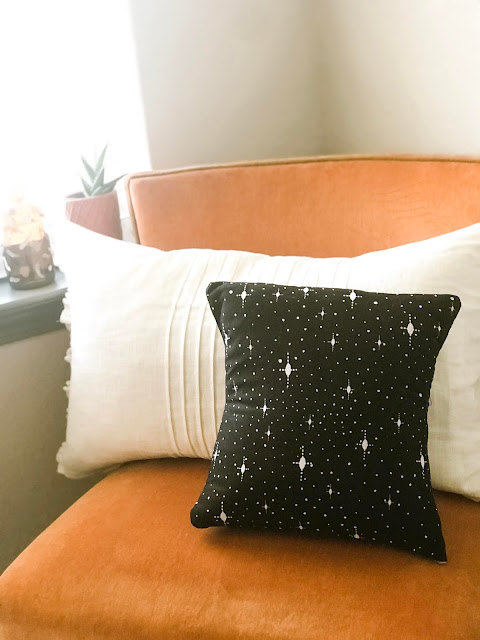
This week I'm going to show you how to make an easy pillow for a fraction of the cost! This project is for beginners - someone who's never used a sewing machine before will be able to make this pillow with ease. Pick out some fabric and get a pillow form in any size you want. I am using this gorgeous black starry night fabric from Hope Yoder's Mandala Tango fabric by Blank Quilting Corp. I'm obsessed with this fabric and you can find it here.
To start, cut three squares of your fabric one inch wider than your pillow. I cut my fabric squares to 13" by 13". Two of the squares will be used for the back, and one of the squares will be for the front. We are going to use the two fabric squares on the back to make a fold where you can easily slip your pillow in and out to clean your pillow case!

Fuse Embellish® Premium Fusible Batting to the front piece of your fabric with the rough side fused to the wrong side of your fabric. This will ensure that your pillow will not look lumpy when it's done. I love using this batting because it's not bulky and ensures a nice, professional looking pillow that will retain its shape.


This week I'm going to show you how to make an easy pillow for a fraction of the cost! This project is for beginners - someone who's never used a sewing machine before will be able to make this pillow with ease. Pick out some fabric and get a pillow form in any size you want. I am using this gorgeous black starry night fabric from Hope Yoder's Mandala Tango fabric by Blank Quilting Corp. I'm obsessed with this fabric and you can find it here.


I made this blue pillow WITHOUT using the batting, and you can tell because it looks really lumpy and sad! If you compare that to my pillow WITH batting, you can tell why I love this product so much!

Next, fuse Embellish® Fusible Underlay Bold to the wrong side of your back piece of fabric. I love using Fusible Underly Bold to strengthen my fabric so that the back part will be durable and hold up over time as you're washing it and removing the pillow. This will also keep the fabric from puckering once we sew our pillowcase.
Once both the front piece and one of the back pieces are prepped, you are going to lay the front piece down with the right side facing up. Fold the back piece that DOESN'T have the Underlay Bold fused to it in half hotdog-style with the wrong sides together. Place this folded back piece on top of the front piece, with the fold in the center of your front piece. Next, place the back piece with the Fusible Underlay Bold on top of everything with the pretty side facing down. Pin all pieces in place and sew around all four corners. I love that for this style pillow you don't need to leave a gap to stuff your pillow that you have to come back and hand-sew later. The flap allows you to place the pillow right in!

Once your pillow is sewed along all four edges, cut off the excess fabric and turn right-side out. Your pillow case is ready now! Stuff your pillow in and you are good to go! Now that you know how to make a basic pillow case, you can start experimenting with different fabrics, shapes, and sizes. You can even add some embroidery to the front piece of your pillow to spice it up!
Click on the video below to watch me make this pillow !


Comments